Microsoft Windows updates are vital for security and performance, but they don’t always work flawlessly. If you’re reading this, you’re most likely facing the 0x80070057 error in Microsoft Windows 10 or 11. This annoying code, often appearing as “E_INVALIDARG,” indicates that Windows has encountered an invalid argument; essentially, a file or system parameter it wasn’t expecting.
We’ll guide you through this issue, from the simplest, most automated solutions to more advanced or manual ones. Let’s get your computer system updated again right away.
What is Error 0x80070057?
Error code 0x80070057 typically appears when Windows Update fails due to incorrect parameters, corrupted system files, or misconfigured update components.
| Technical Feature | Details |
|---|---|
| Error Code | 0x80070057 |
| Official Name | E_INVALIDARG (Invalid Argument) |
| Platform | Windows 11, Windows 10, Server |
| Primary Causes | Corrupted Cache, Registry Errors, File Damage |
| Difficulty | Intermediate (No special tools needed) |
| Estimated Time | 10 – 15 Minutes |
| Key Repair Tools | SFC, DISM, Update Troubleshooter |
1. What Causes Windows Error 0x80070057?
Before moving on to Windows error solutions, understanding the root cause of the problem will help you choose the right solution. This invalid Microsoft Windows argument error is usually caused by:
Corrupted Windows Update Services: Essential background services responsible for receiving or installing updates on your computer may be malfunctioning.
Corrupted System Files: Essential Windows files required for the update process are likely damaged, causing the error.
Windows Registry Configuration Errors: Incorrect or outdated entries in the Microsoft Windows Registry can mislead the update mechanism.
File System Damage: Physical or system problems on your storage drive (HDD/SSD) that prevent data access.
2. Solution Level 1: The Fast and Automated Method
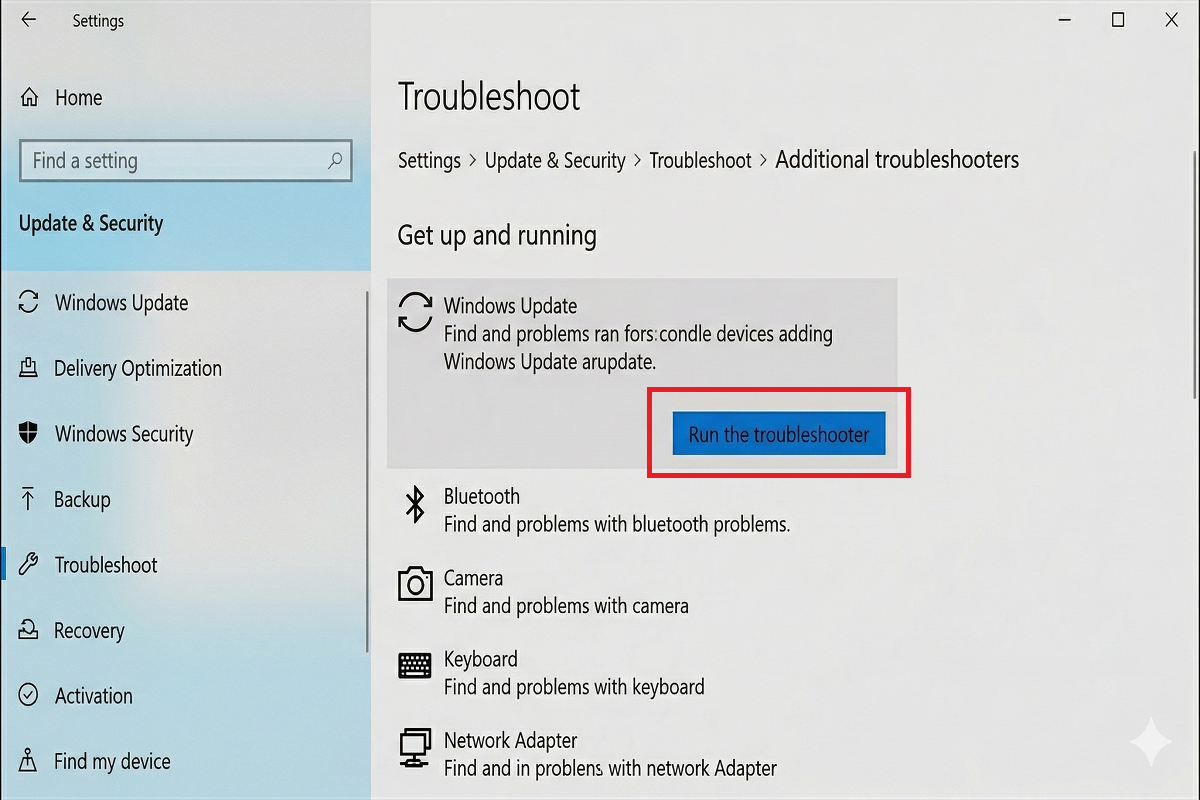
Let’s try the simplest solution first. Microsoft Windows automatically detects standard update problems and includes a built-in troubleshooter designed to fix them.
Microsoft Windows 10: Go to Settings > Update & Security > Troubleshooting > Additional troubleshooters. Select Windows Update and click Run troubleshooter.
Microsoft Windows 11: Go to Settings > System > Troubleshooting > More troubleshooters, then click Run next to Windows Update.
Windows will then scan the update cache, restart vital services, and attempt to resolve the underlying conflict. If successful, the process is complete!
3. Solution Level 2: Advanced Manual Intervention (SFC – DISM)
If troubleshooting fails, we need to manually address and repair system integrity. There are two powerful commands for this.
1. SFC (System File Checker)
SFC compares your system files to the best known original files on the system.
Open the Start menu, type “CMD”, and right-click on the command prompt in the resulting window and run it as administrator.
Type the following command and then press Enter: sfc /scannow
This process may take some time; do not close or interrupt the screen. Pay attention to the results when it’s finished.

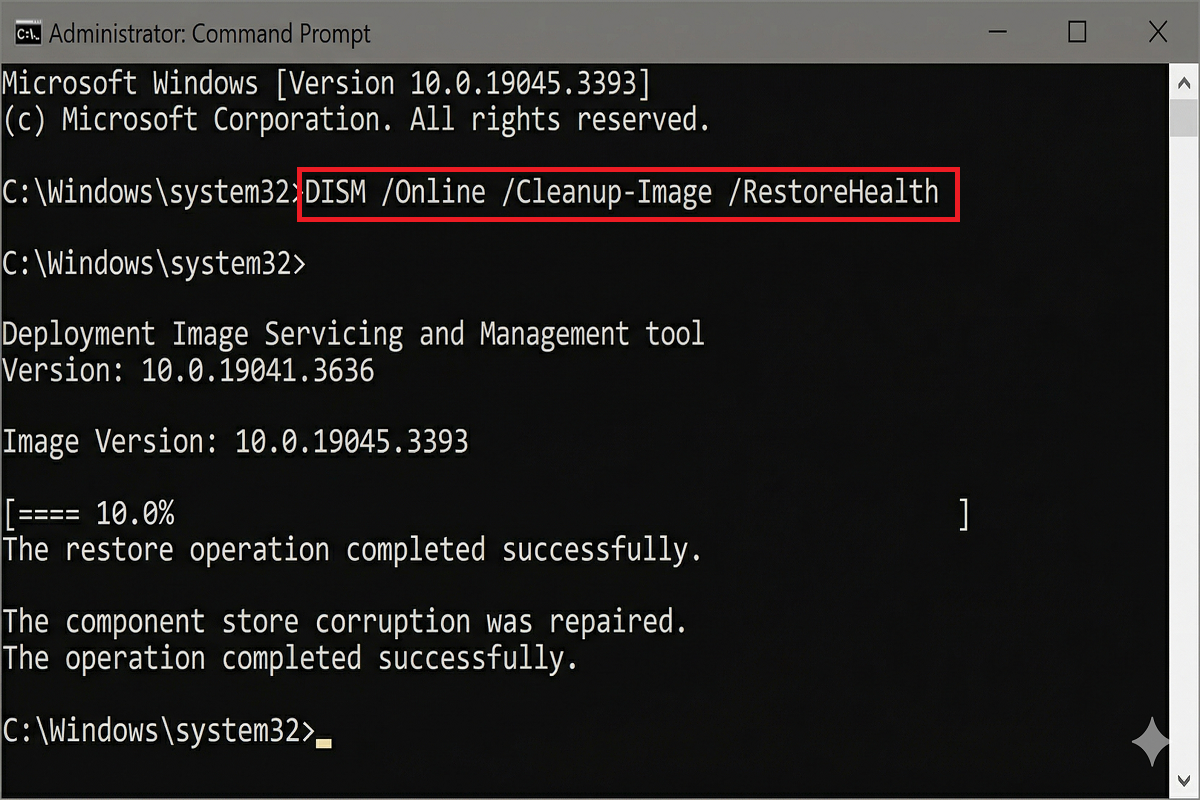
2. DISM (Deployment Image Servicing and Management)
DISM repairs the Microsoft Windows component store itself, which is the source from which SFC restores files. To do this, follow these steps:
Similarly, run the command prompt as administrator and type the following command, then press Enter: DISM /Online /Cleanup-Image /RestoreHealth
This command may take longer as it connects to Windows Update servers; do not interrupt it.
4. Solution Level 3: Reset Windows Update Services and Components
If even DISM fails, the problem may be in the component store or update cache. The last resort is to reset the entire update mechanism.
Open the Administrative Command Prompt (CMD).
1. Type this command to stop the update-related services: “net stop wuauserv” and “net stop bits“.
2. Rename the SoftwareDistribution and Catroot2 folders. These are temporary update caches on the system. Renaming them will cause Windows to recreate them. To do this:
- “ren C:\Windows\SoftwareDistribution SoftwareDistribution.old”
- “ren C:\Windows\System32\catroot2 Catroot2.old”
3. Restart the services: `net start wuauserv` and `net start bits`.
4. Check for Windows Updates again.
Bu adımları izledikten sonra sisteminiz çalışır durumdaysa, gelişmiş Windows araçlarını kullanarak hatayı başarıyla düzelttiniz demektir.
Does Error 0x80070057 Affect Windows 10 and Windows 11?
Yes, this error commonly appears in both Windows 10 and Windows 11 due to similar update systems.
Note: If the problem persists after following these steps, you can also check the official troubleshooting guide at
Microsoft Support.
Additional Tips
– Make sure your internet connection is stable
– Disable antivirus temporarily
– Free up disk space
– Restart Windows Update service
Conclusion
Windows Update Error 0x80070057 can be fixed using the methods above in both Windows 10 and Windows 11 systems. In most cases, resetting Windows Update components resolves the issue quickly.